How I installed wallpaper at home
If you deal with wallpaper on a daily basis, it’s no wonder that you want to try one or another design at own home. My friends say I’m a wallpaper freak – especially after hearing that I want to put new wallpaper on the wall – again after 2 years! Well, it’s not crazy, just the interior design of the home and myself need a change. Besides, wallpapering is just such a simple tool to change the interior design in a few hours. To be honest, the most difficult part is to choose the right design!
Difficult design decisions
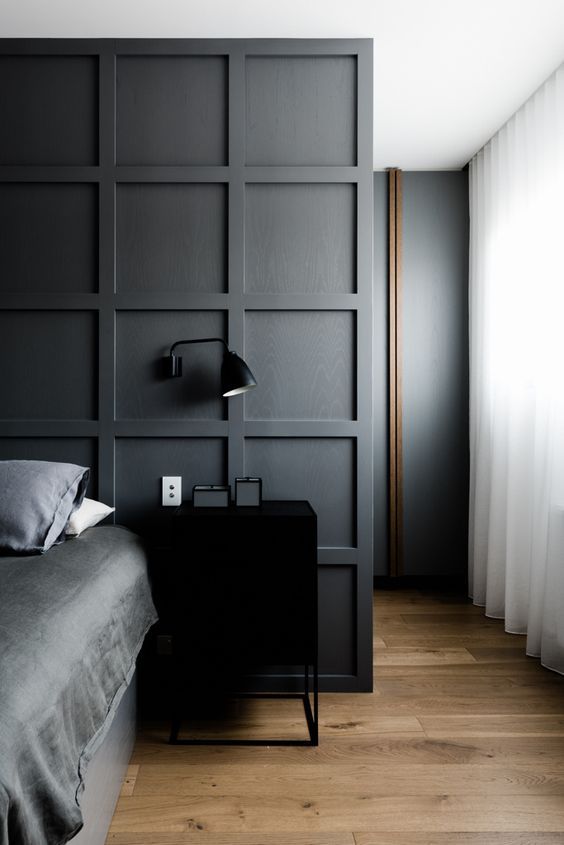
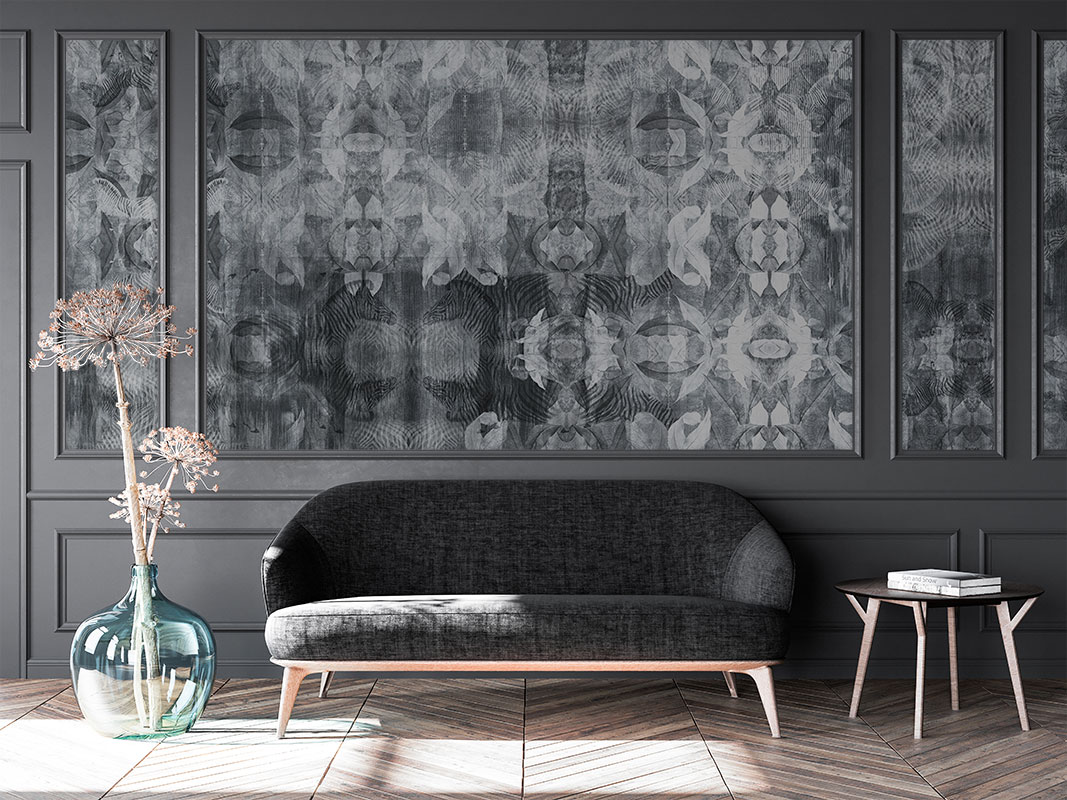
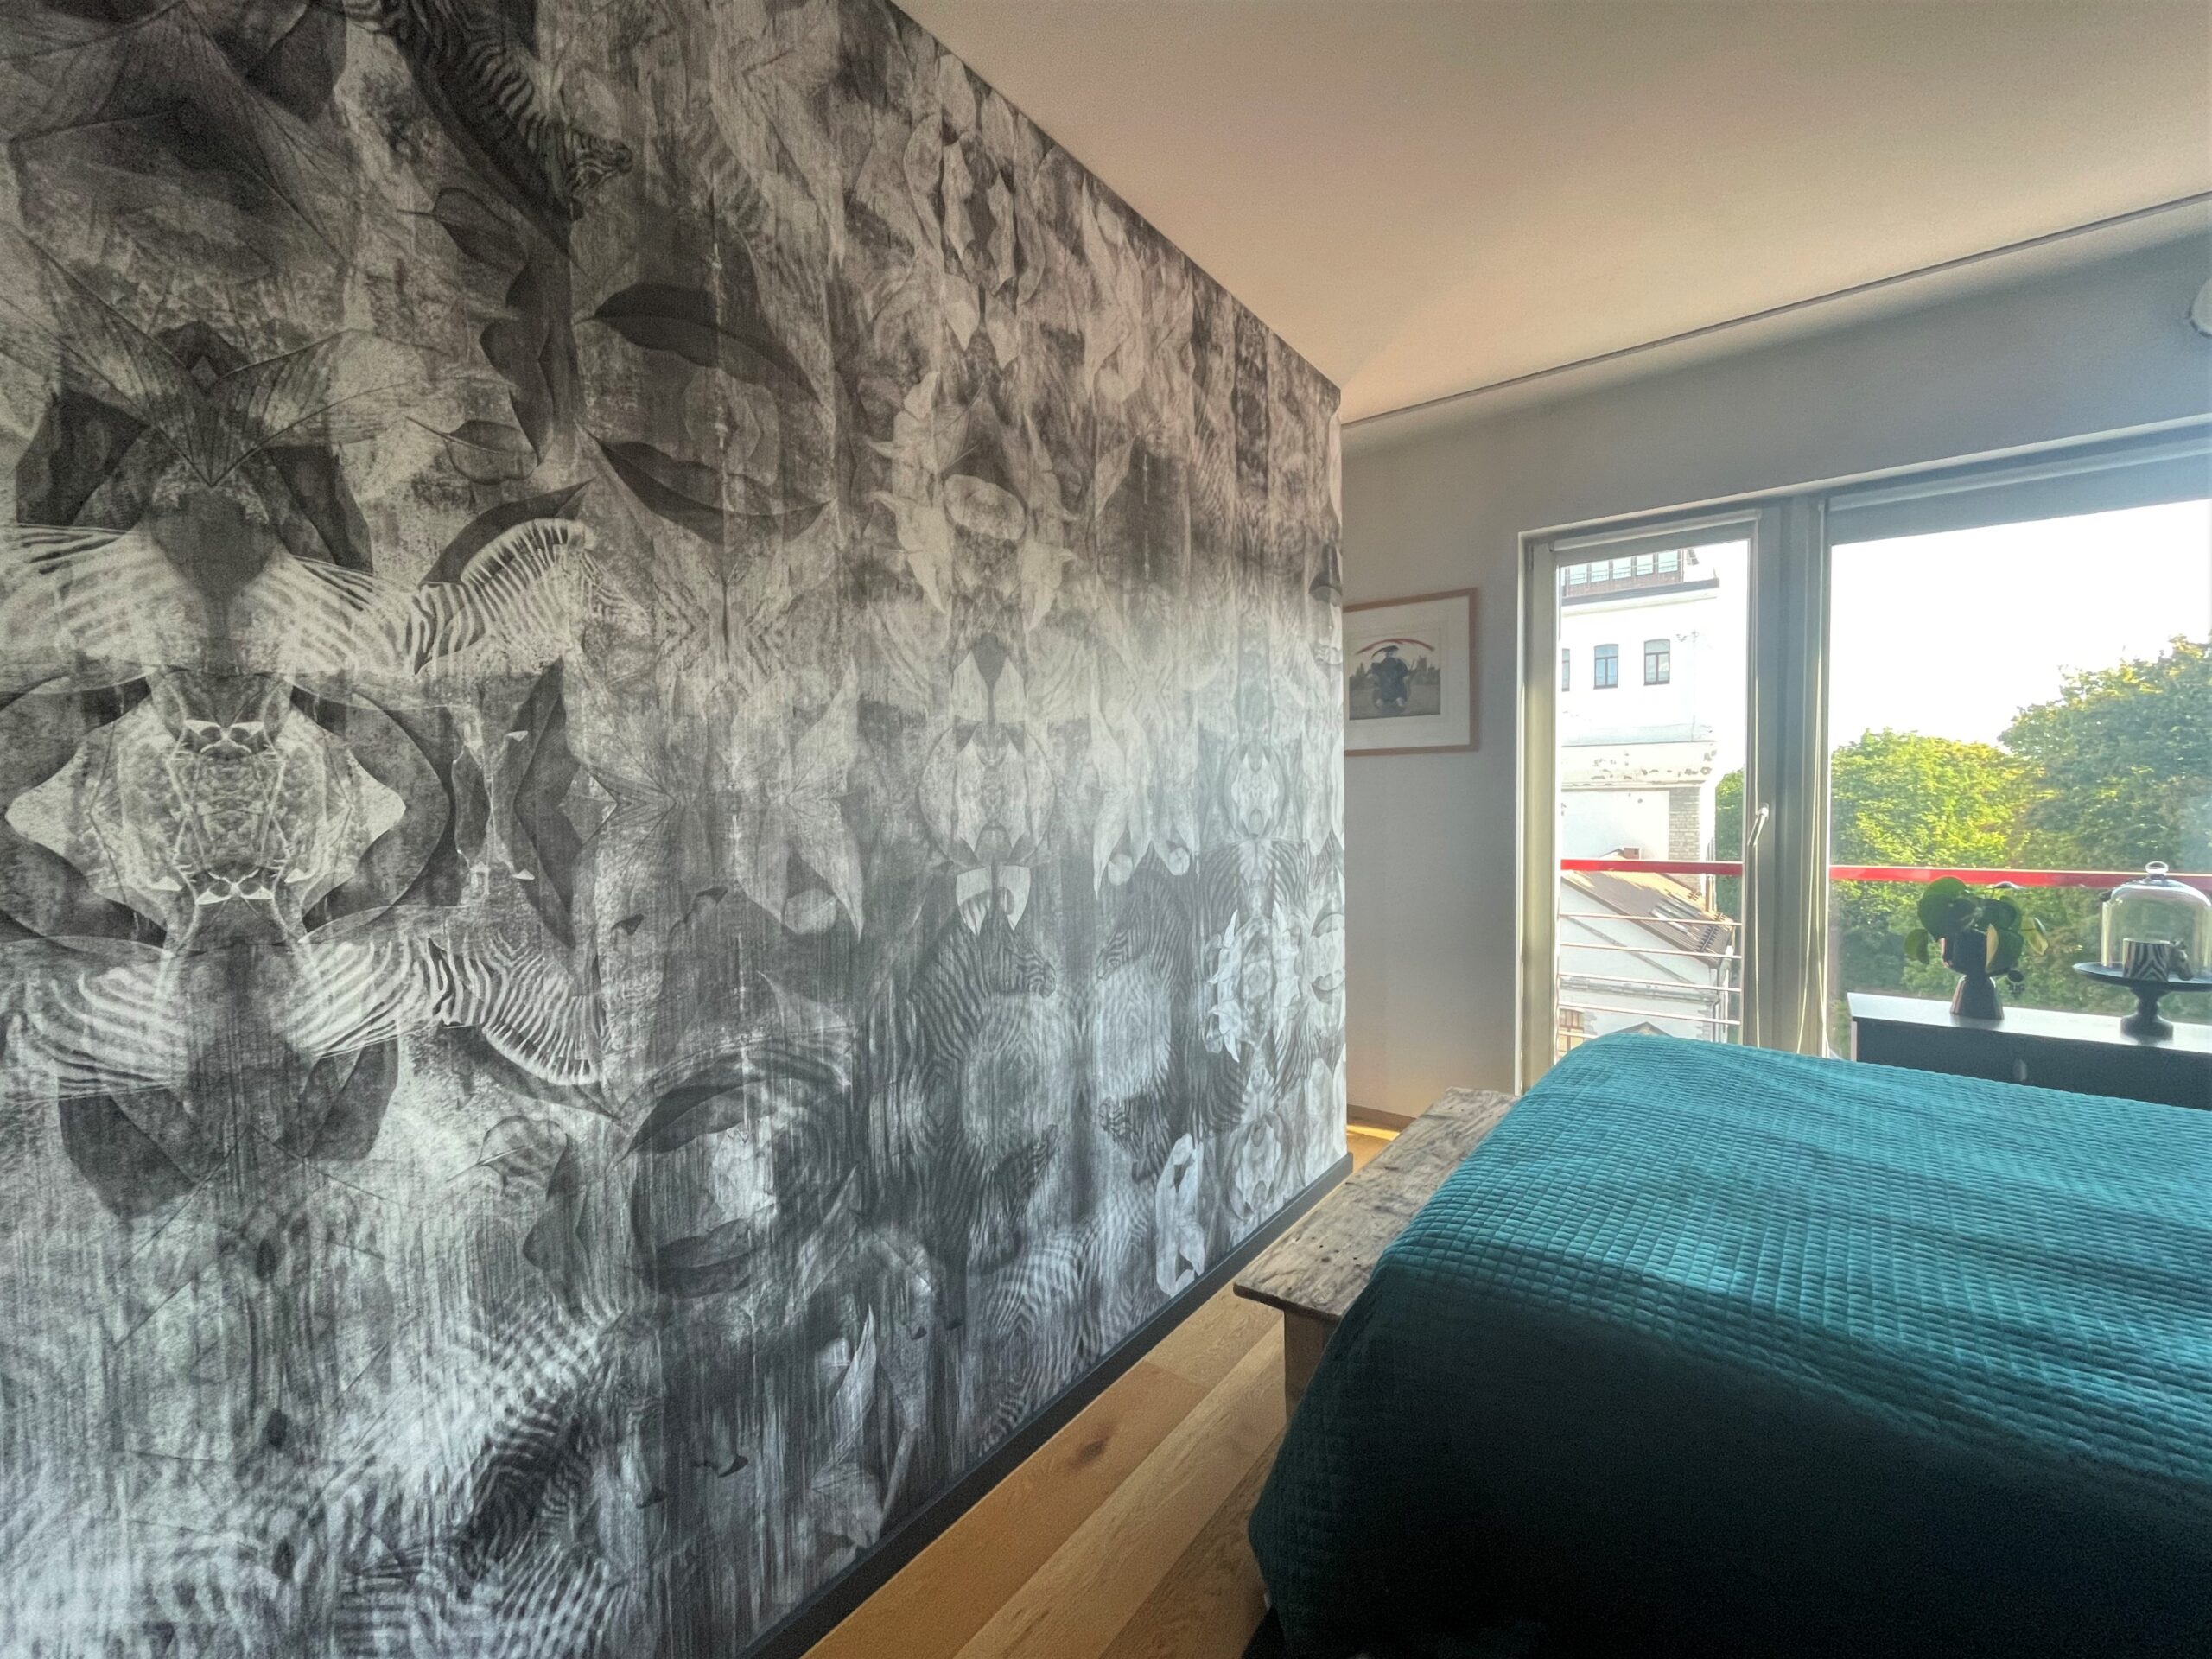
What always helps me, is to start by making a mood board in my mind and, if necessary, also look for ideas on Instagram and Pinterest. For the new “wallpaper” season, I decided to go with darker tones. After all, the bedroom is the place where it should be nice and cozy. In my opinion, this is easier to achieve with darker hues, and dark wallpapers are not to be feared. Also, I chose a mural wallpaper for more artsy result.
Passion for zebra pattern
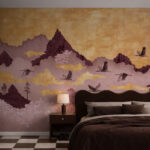
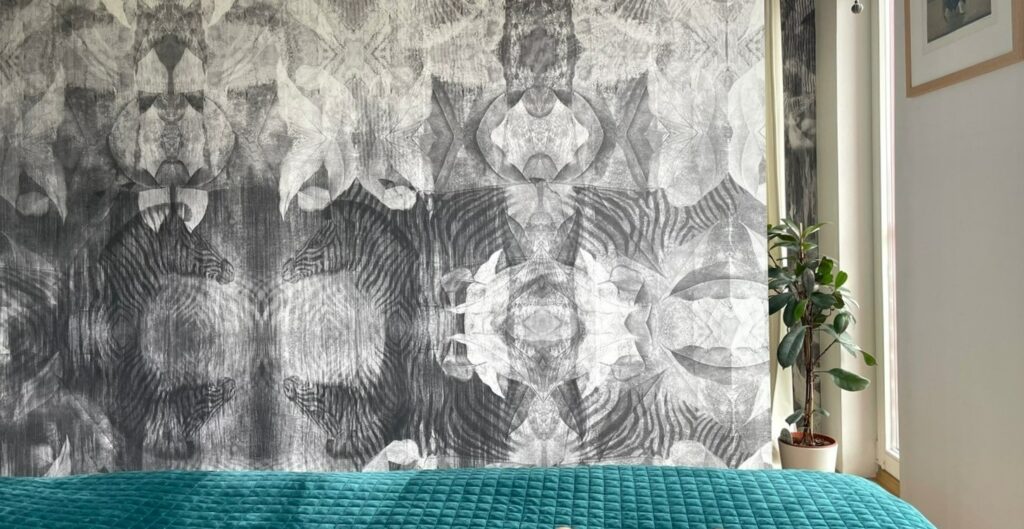
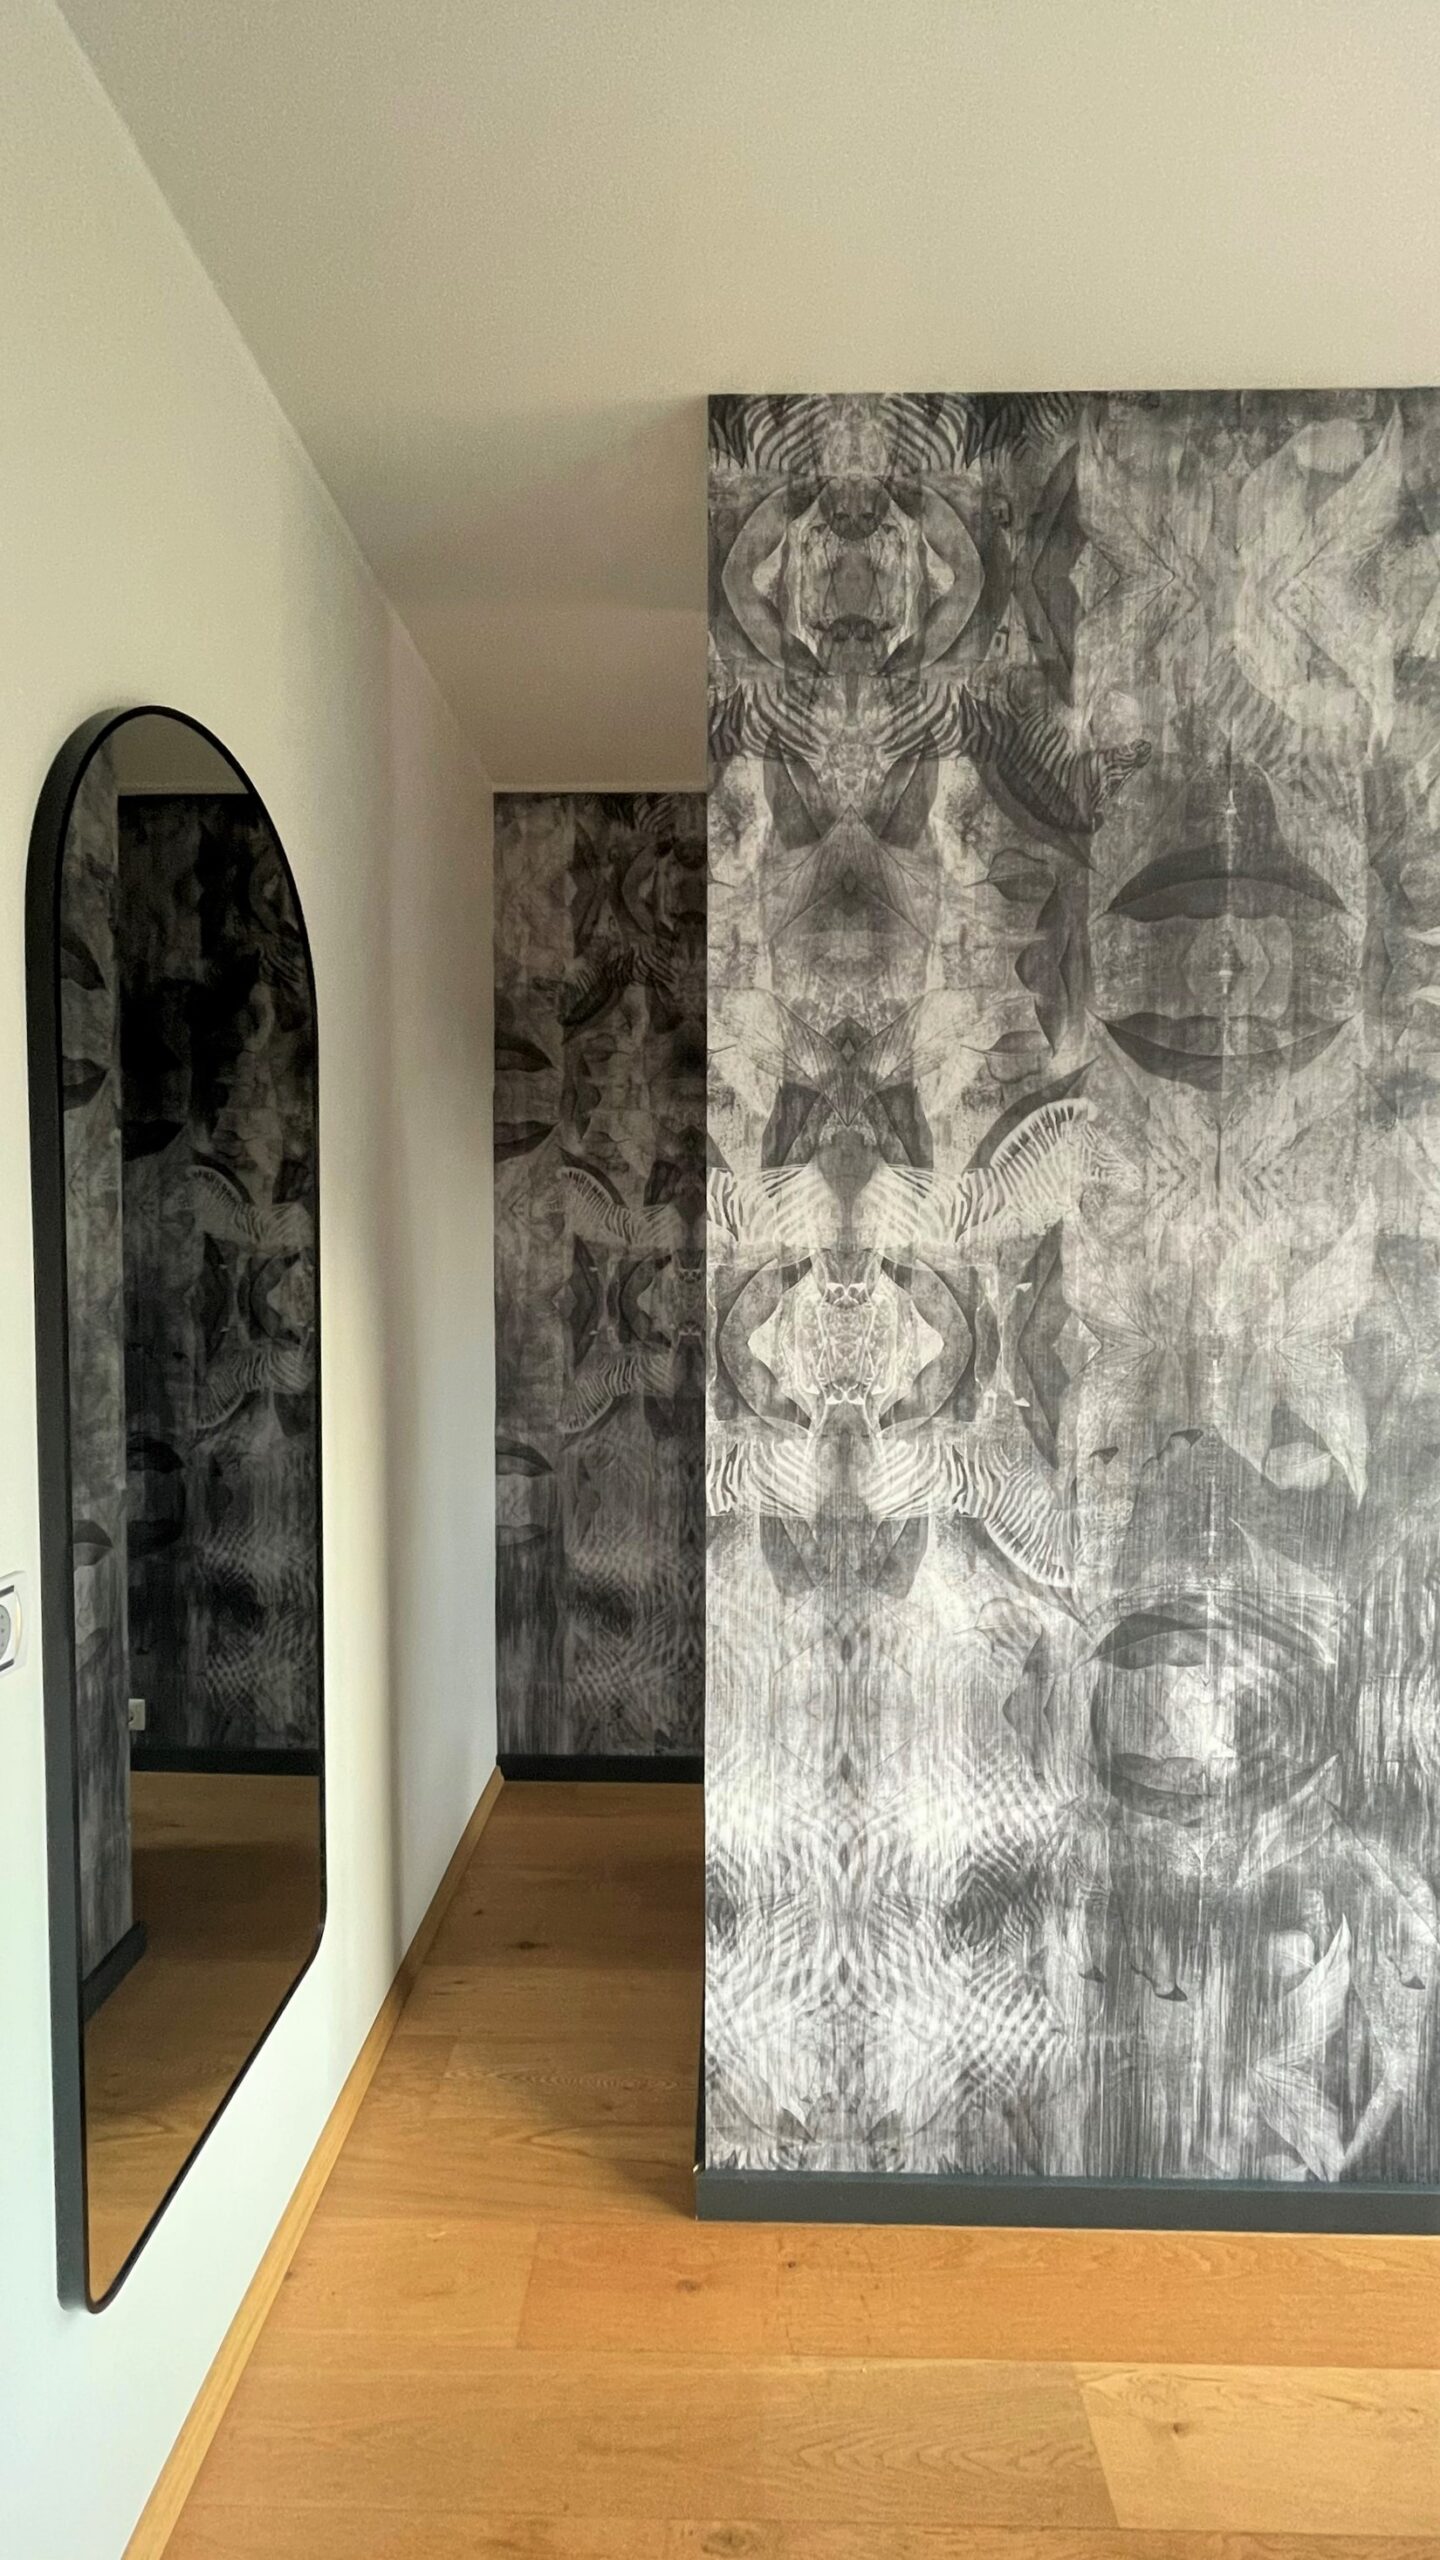
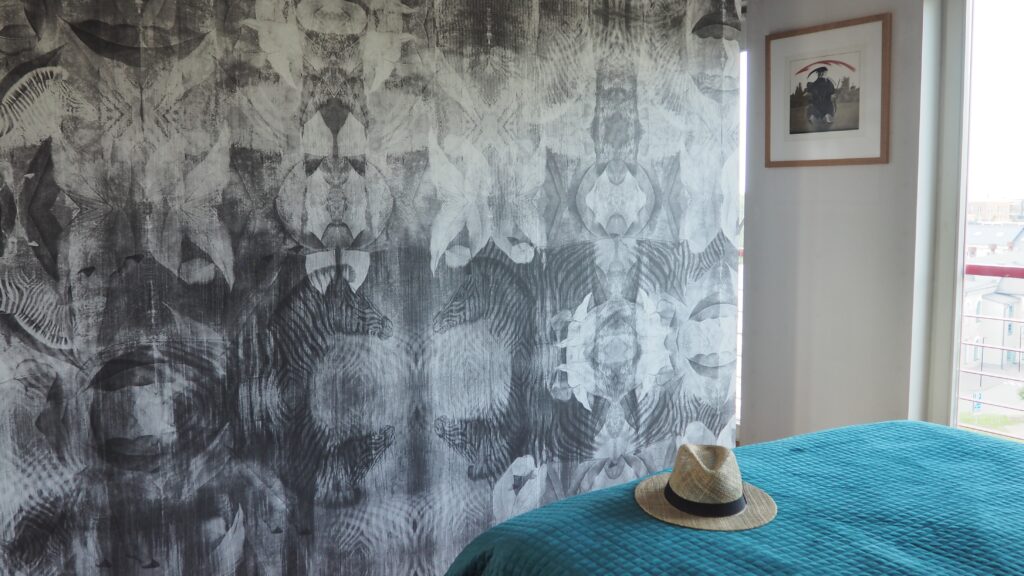
For the last 2 years, the bedroom wall was covered with black and white zebra repeat pattern, which I loved very much. It was a bit of a regret to give them up… That’s probably why my new mural wallpaper choice turned out to be the dark grey wallpaper from the “Unexpected Encounters” collection, with zebras hidden into the pattern!
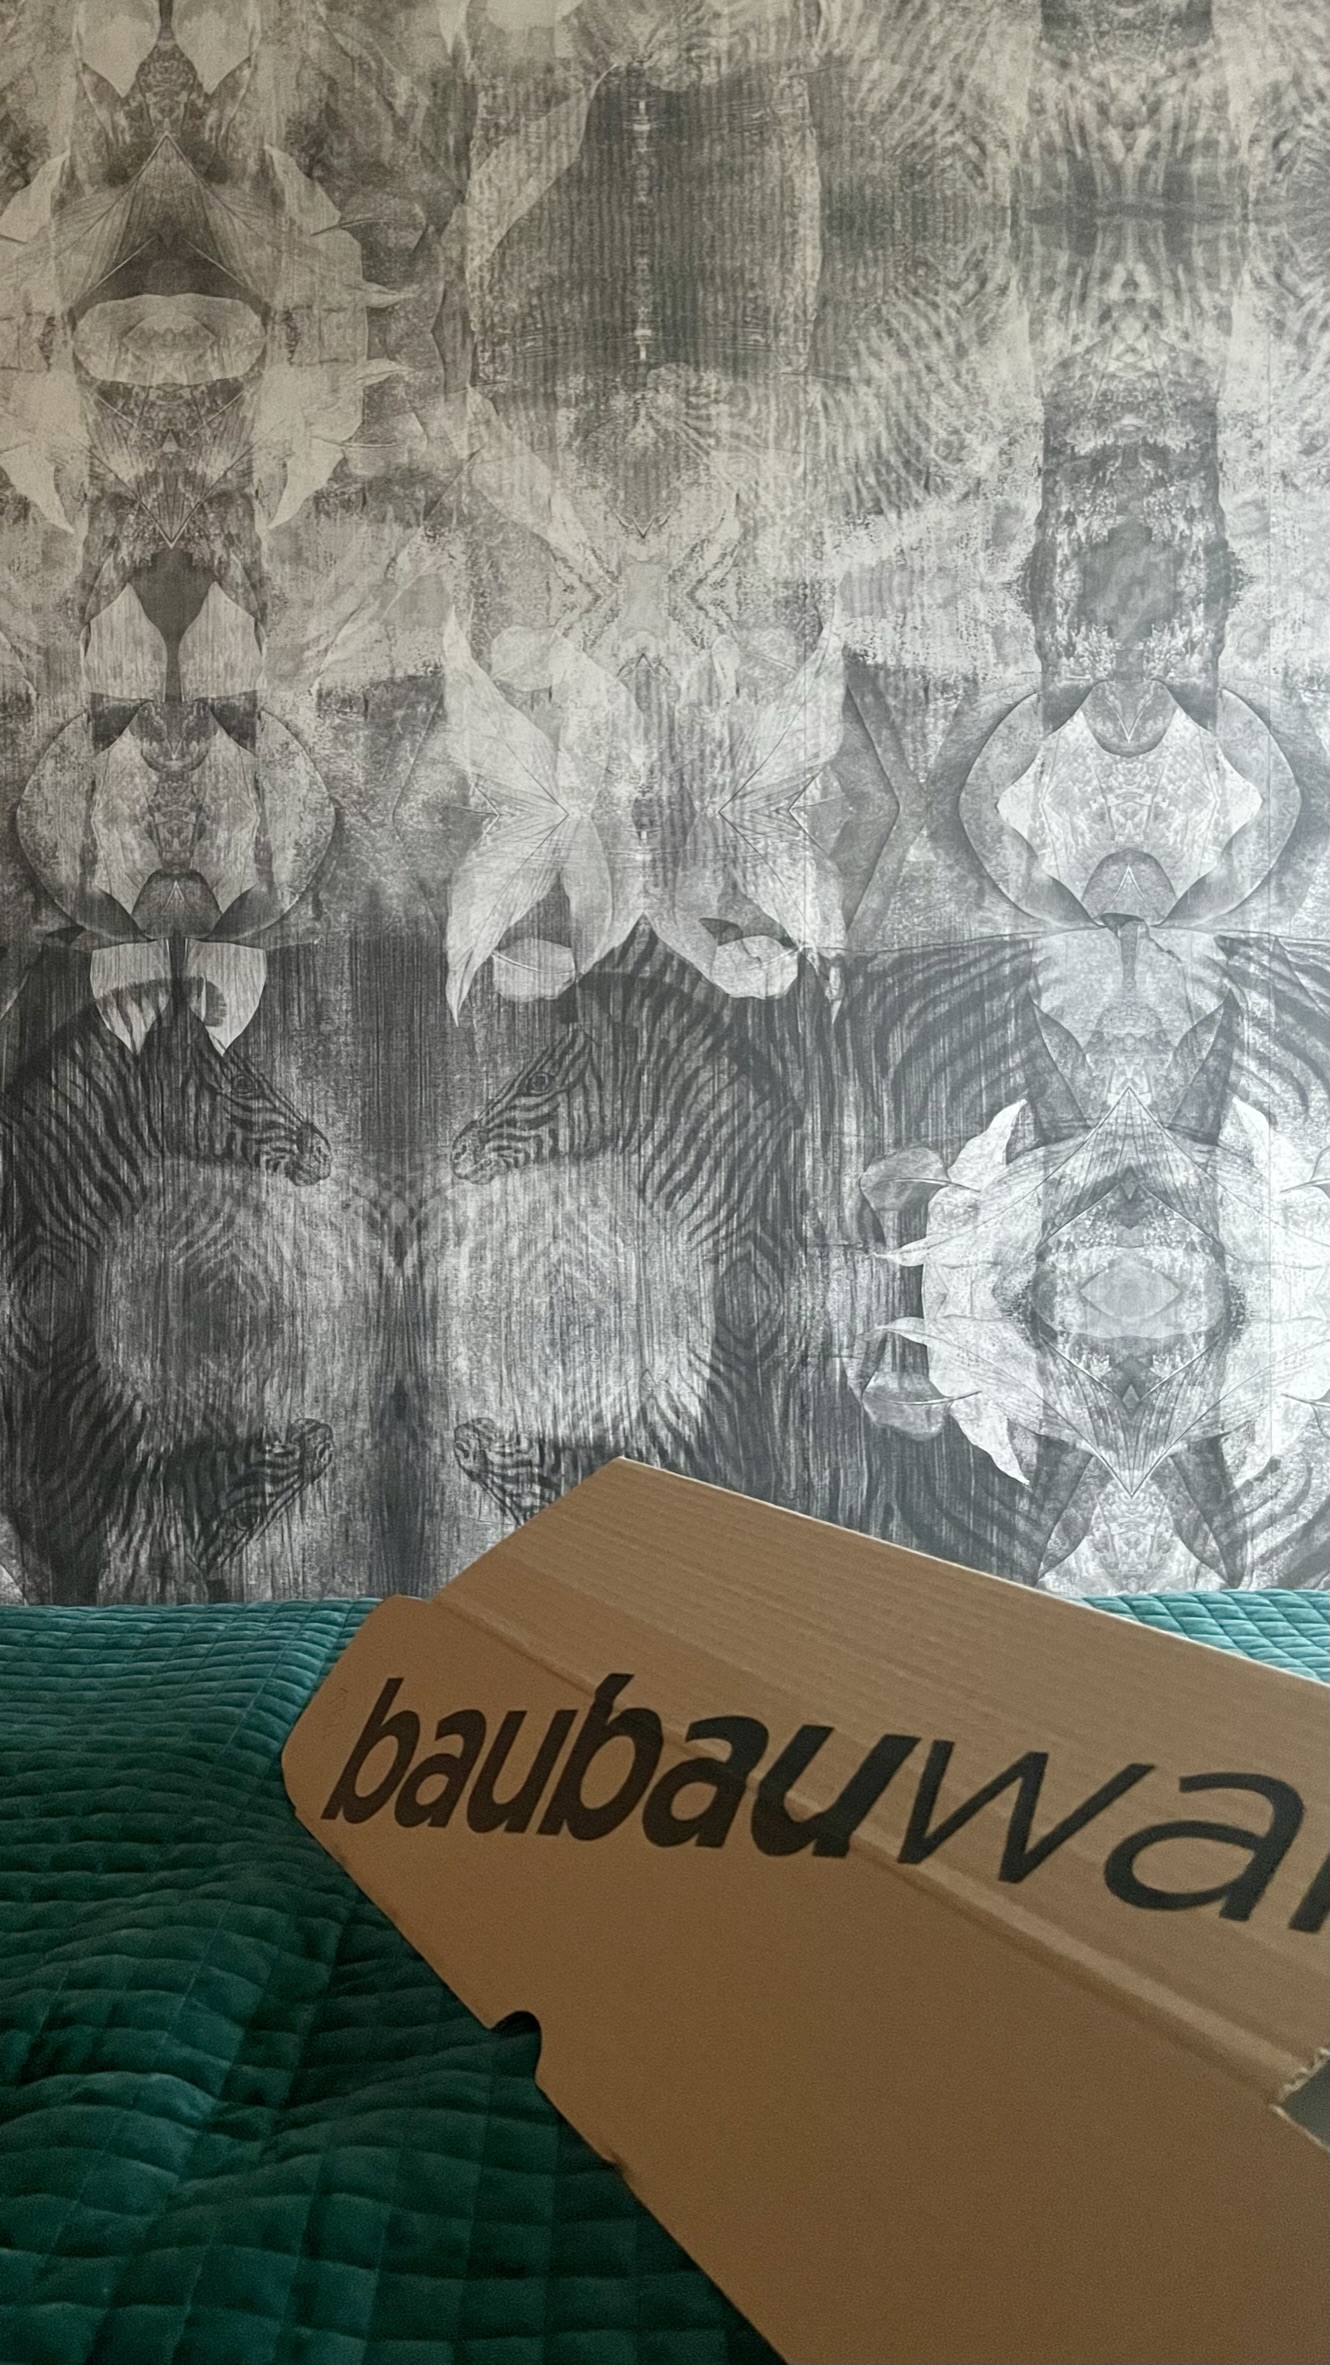
Design decision done, I measured the wall: 400 x 254 cm and ordered the wallpaper online. I received the new wallpaper beauty in 3 days at home! The impatient me started the installation process all by myself the very same evening. Confession – wallpapering for the second time in my life. As I am a DIY person and the process is made simple, wallpapering is not rocket science either.
Removing old wallpaper
Many have heard what a scary is removing old wallpaper form a wall. This might be the case, if you must remove very old wallpaper or a paper based wallpaper. My zebra wallpaper was a non-woven wallpaper, which means that you simply pull the wallpaper from the top edge and tear the entire tile from the top down. Simple! This is how I peeled off the old wallpaper tile by tile. Time: 8 tiles in about 20 minutes!


What matters is what kind of wall is under the old wallpaper. Golden rule of wallpapering: the wall must be smooth! I honestly admit that under my zebra wallpaper, there was a previous resident’s non-woven wallpaper that I didn’t remove at the time. And I decided to do it now. Because the surface of the wall was smooth and well-adherent. I figured if the previous wallpaper didn’t come off in 2 years, it won’t in the next few years either! My home, my rules. (professional wallpaper contractors might argue 😊)
Installing new wallpaper
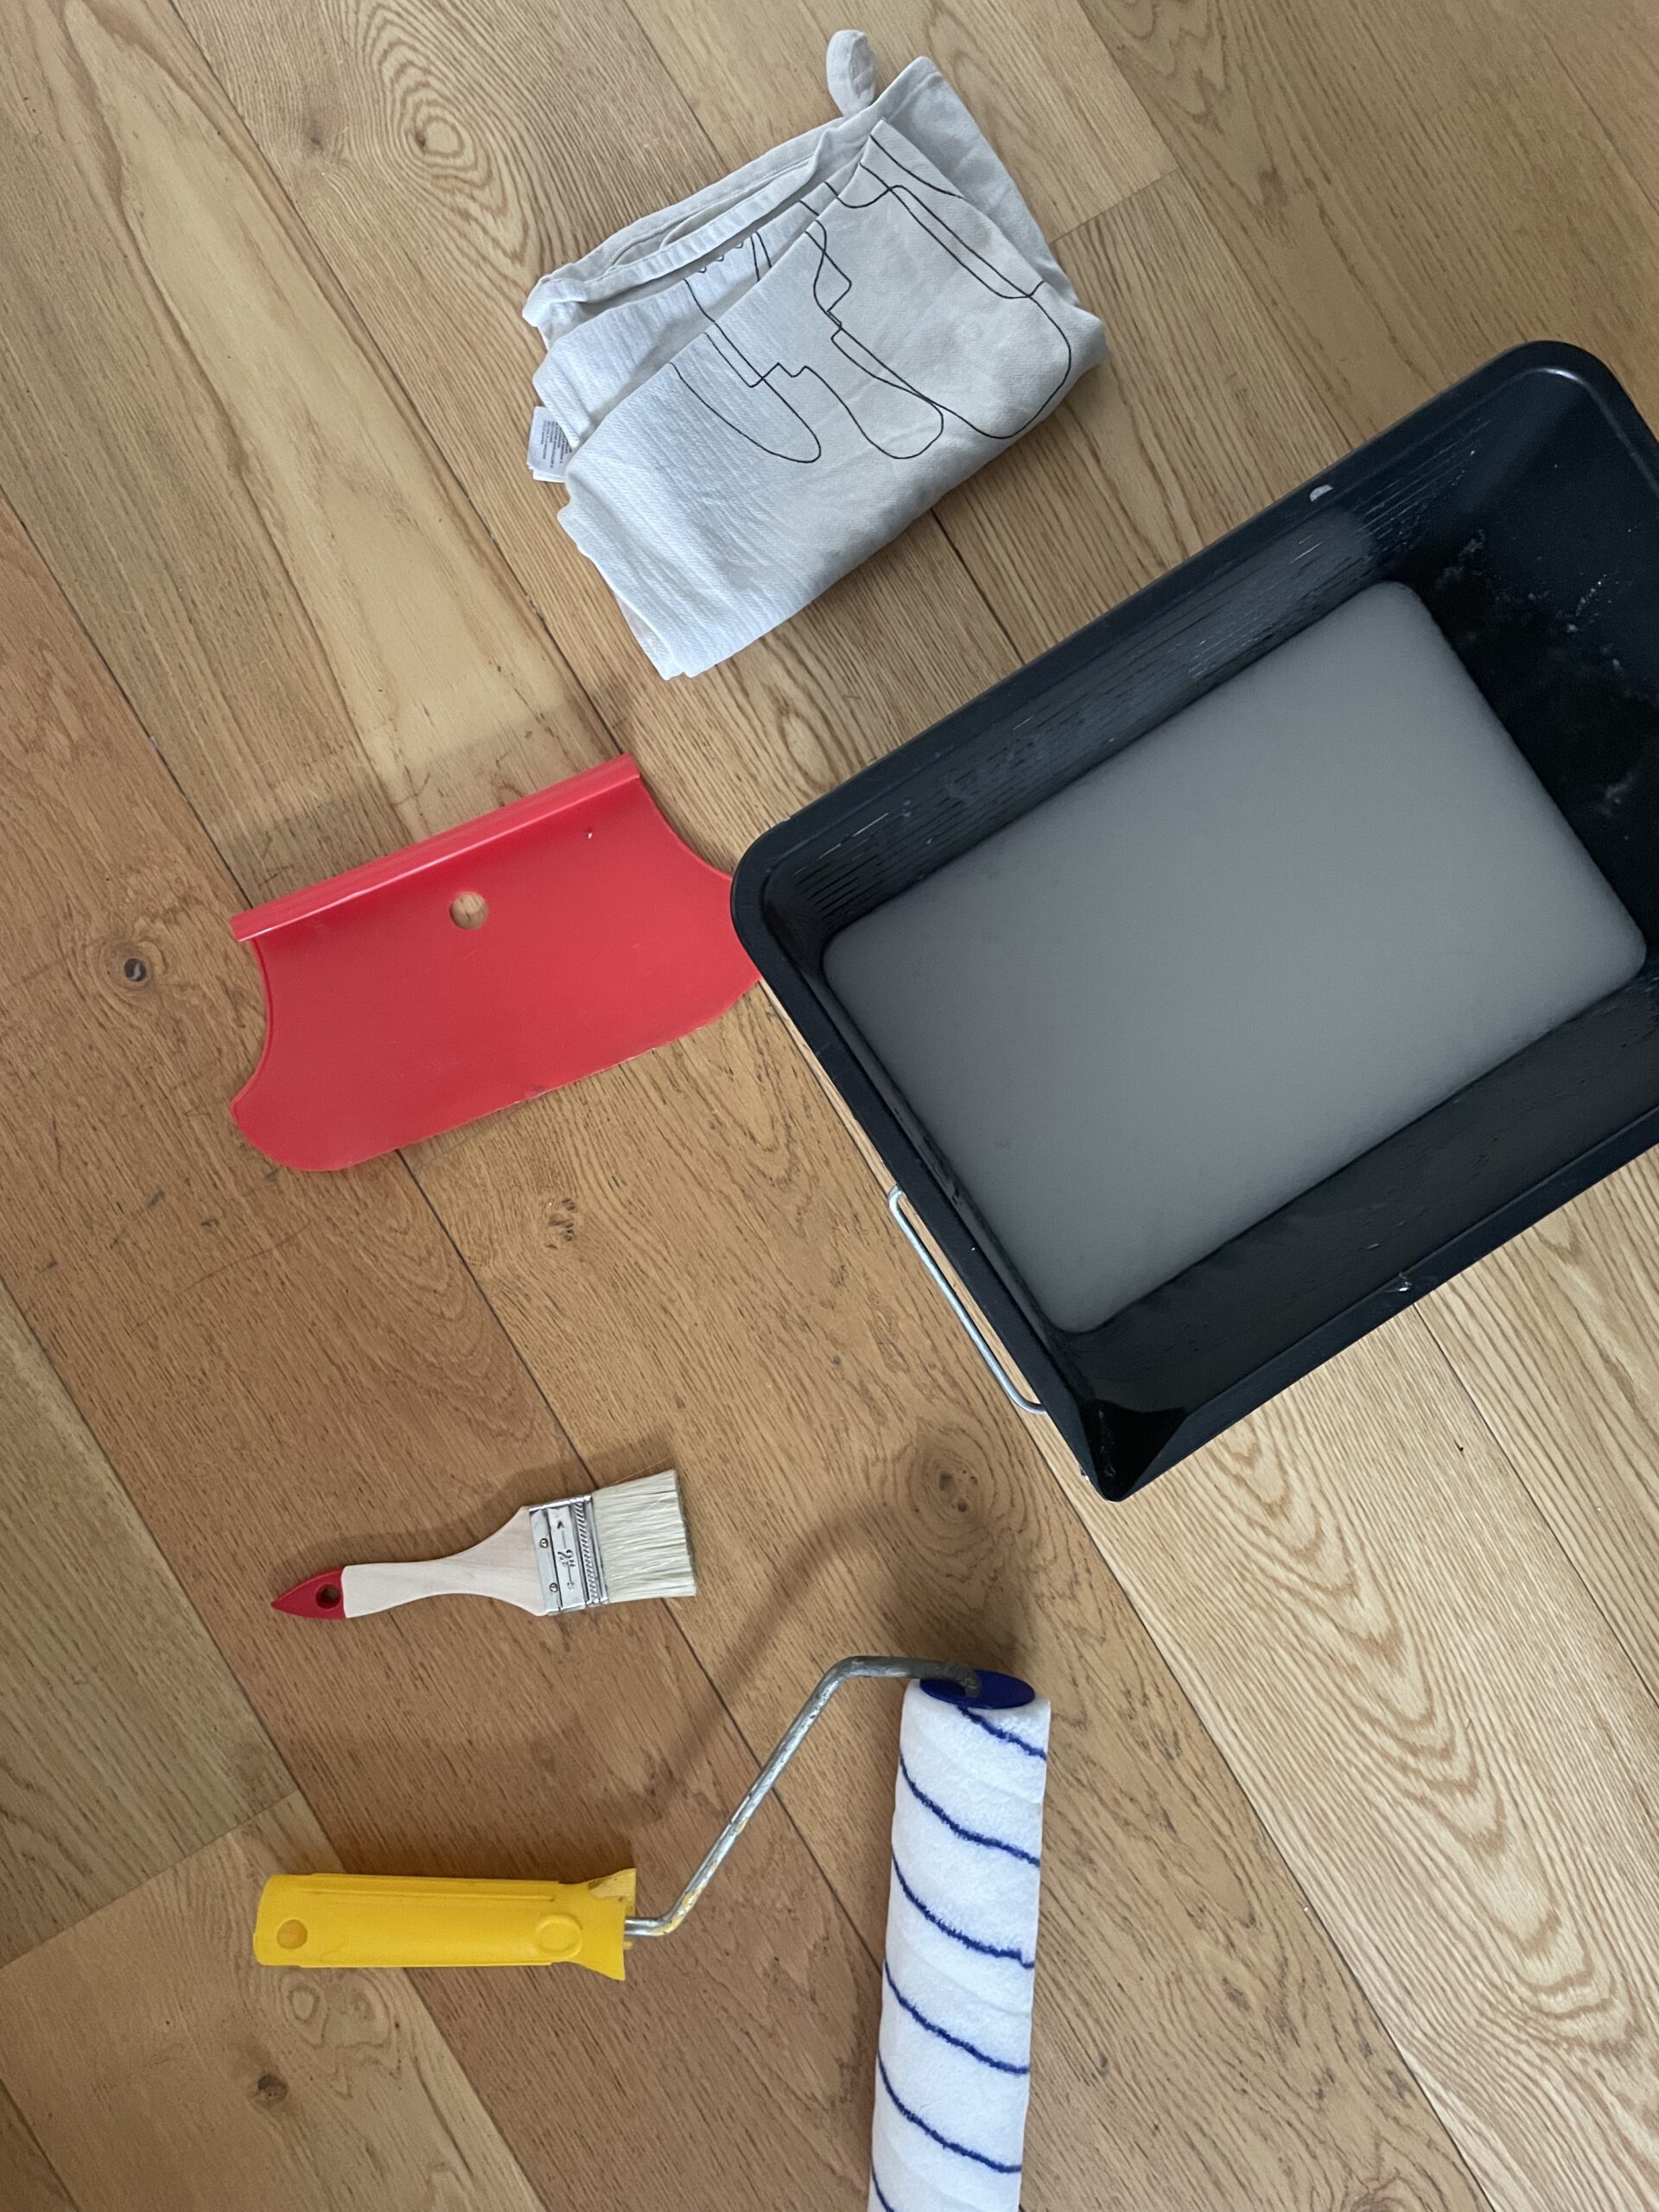
OK, let’s put the new beautiful mural wallpaper on the wall! First thing – check that you have the right tools. Here’ s what you need:
1. A large bowl or bucket for mixing the wallpaper paste
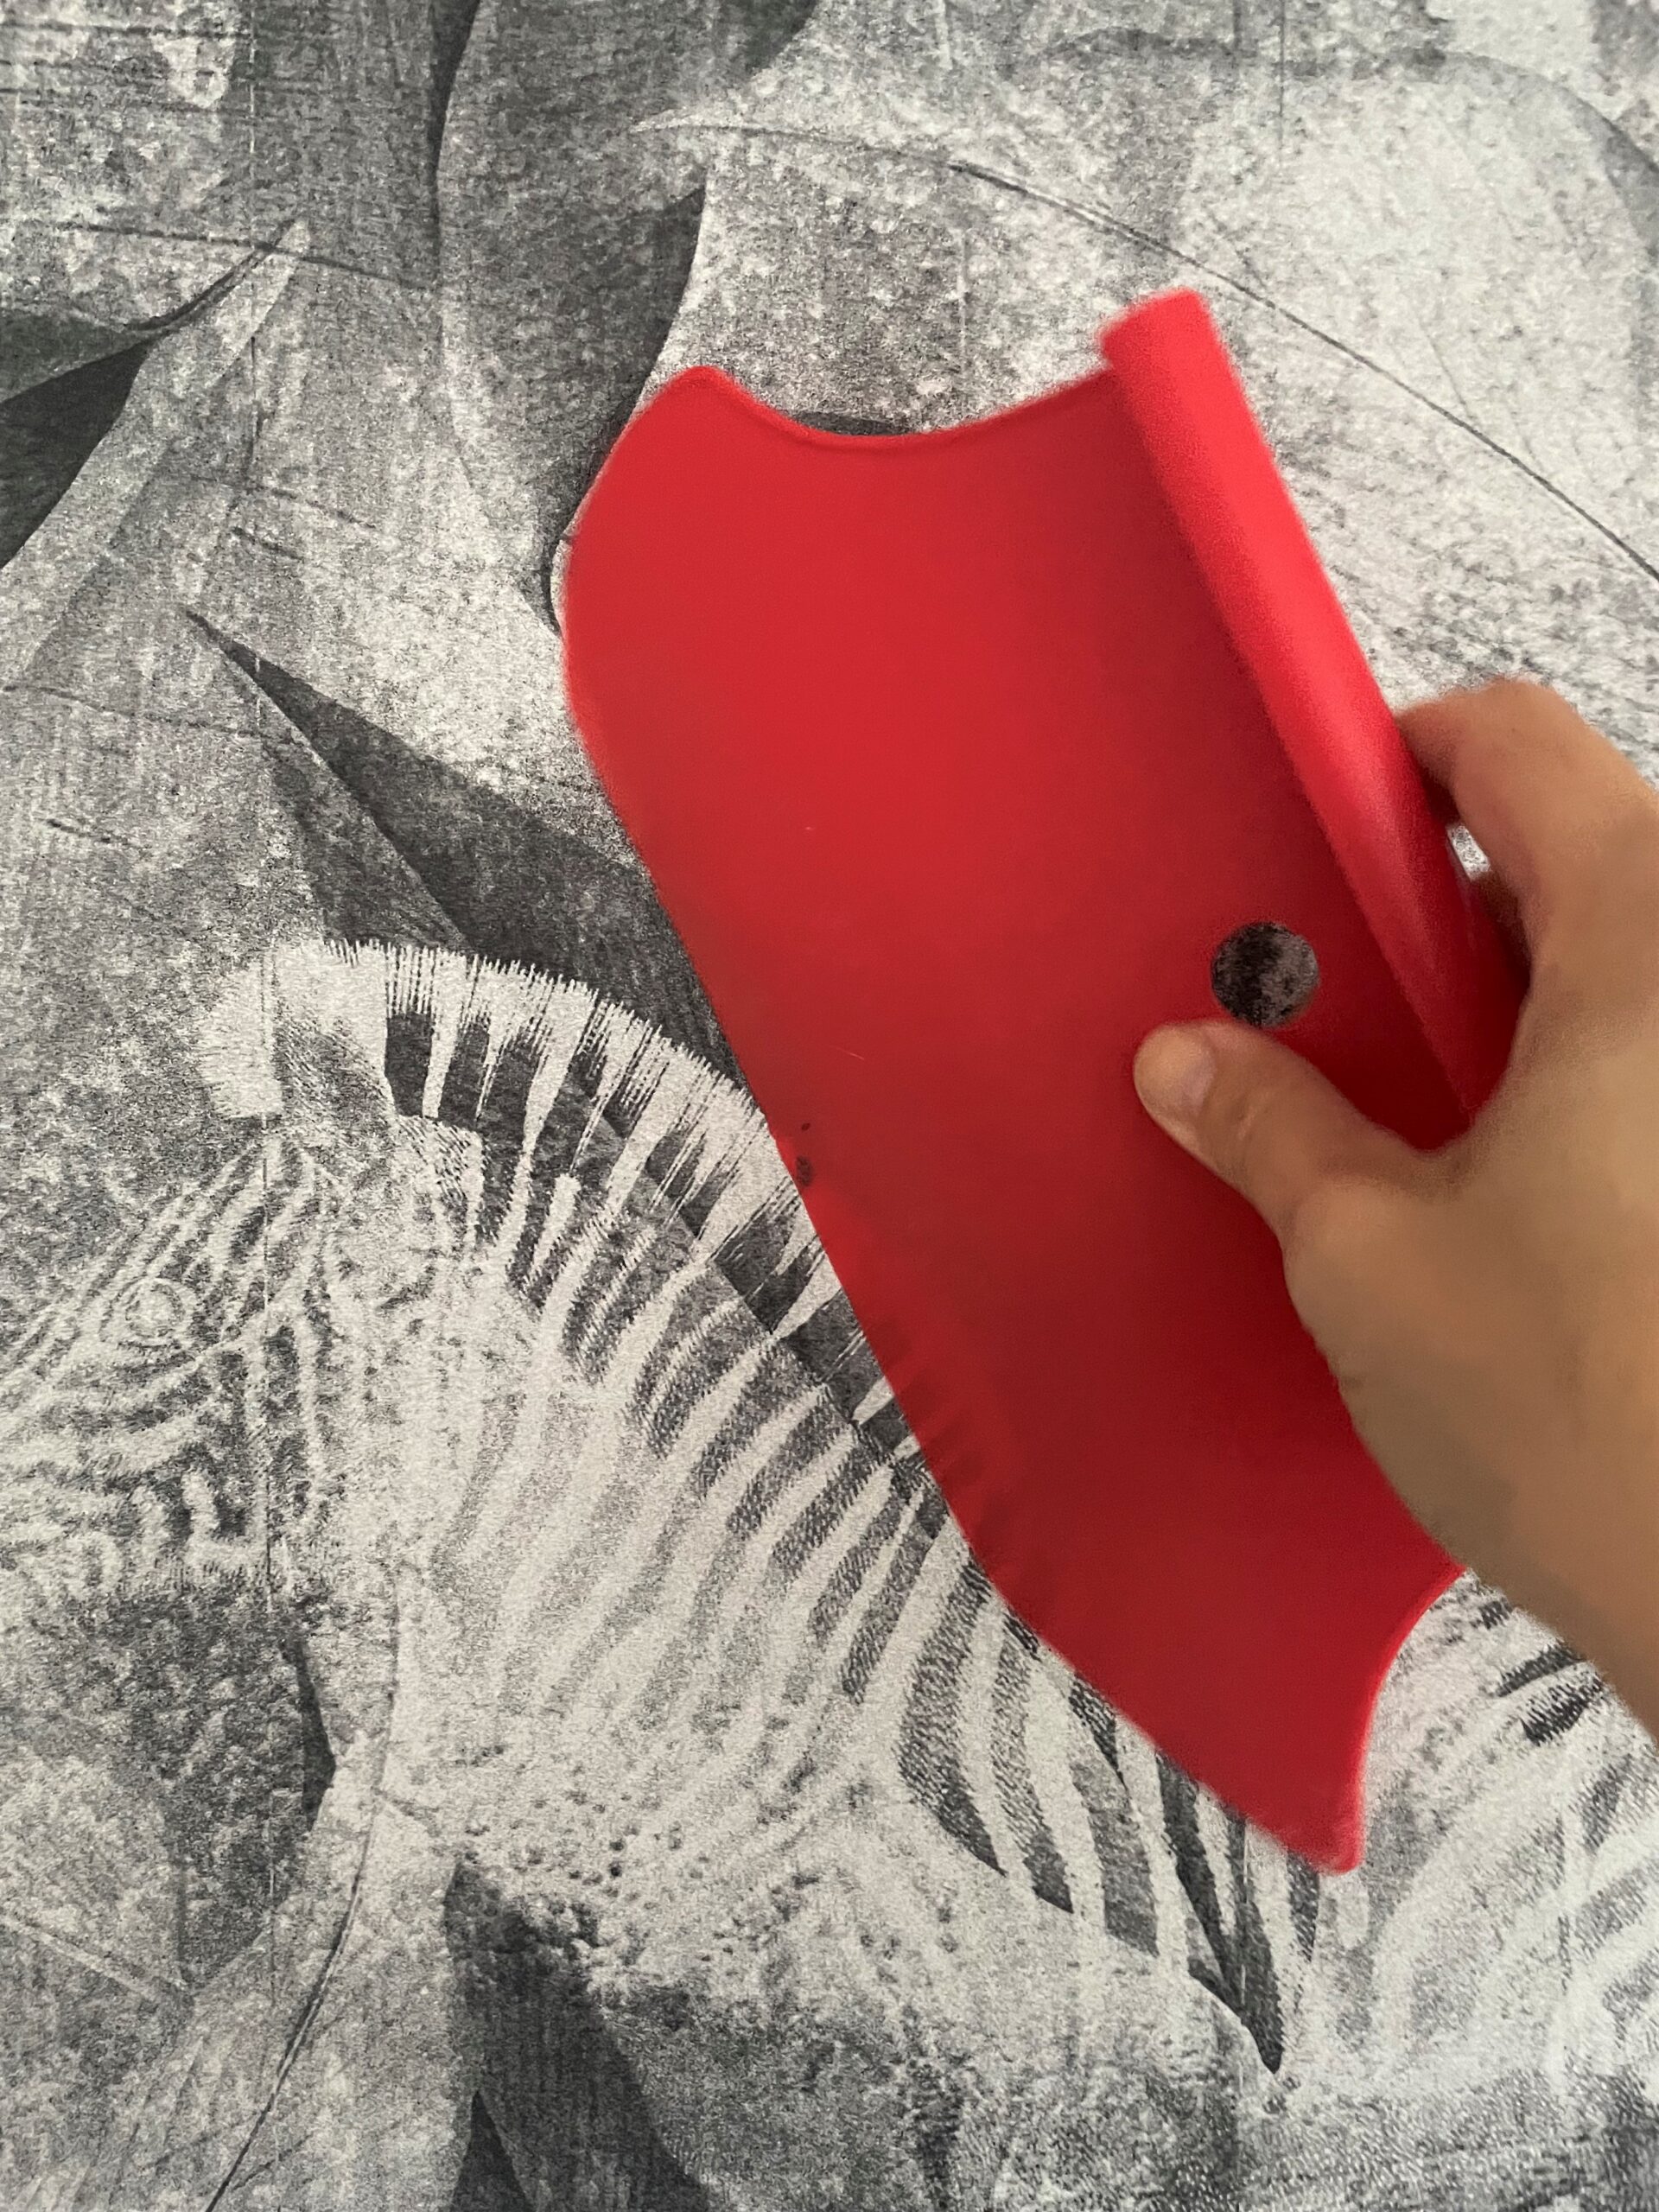
2. Wallpaper smoother / spatula
3. A sharp knife
4. Paint roller or large brush for applying glue
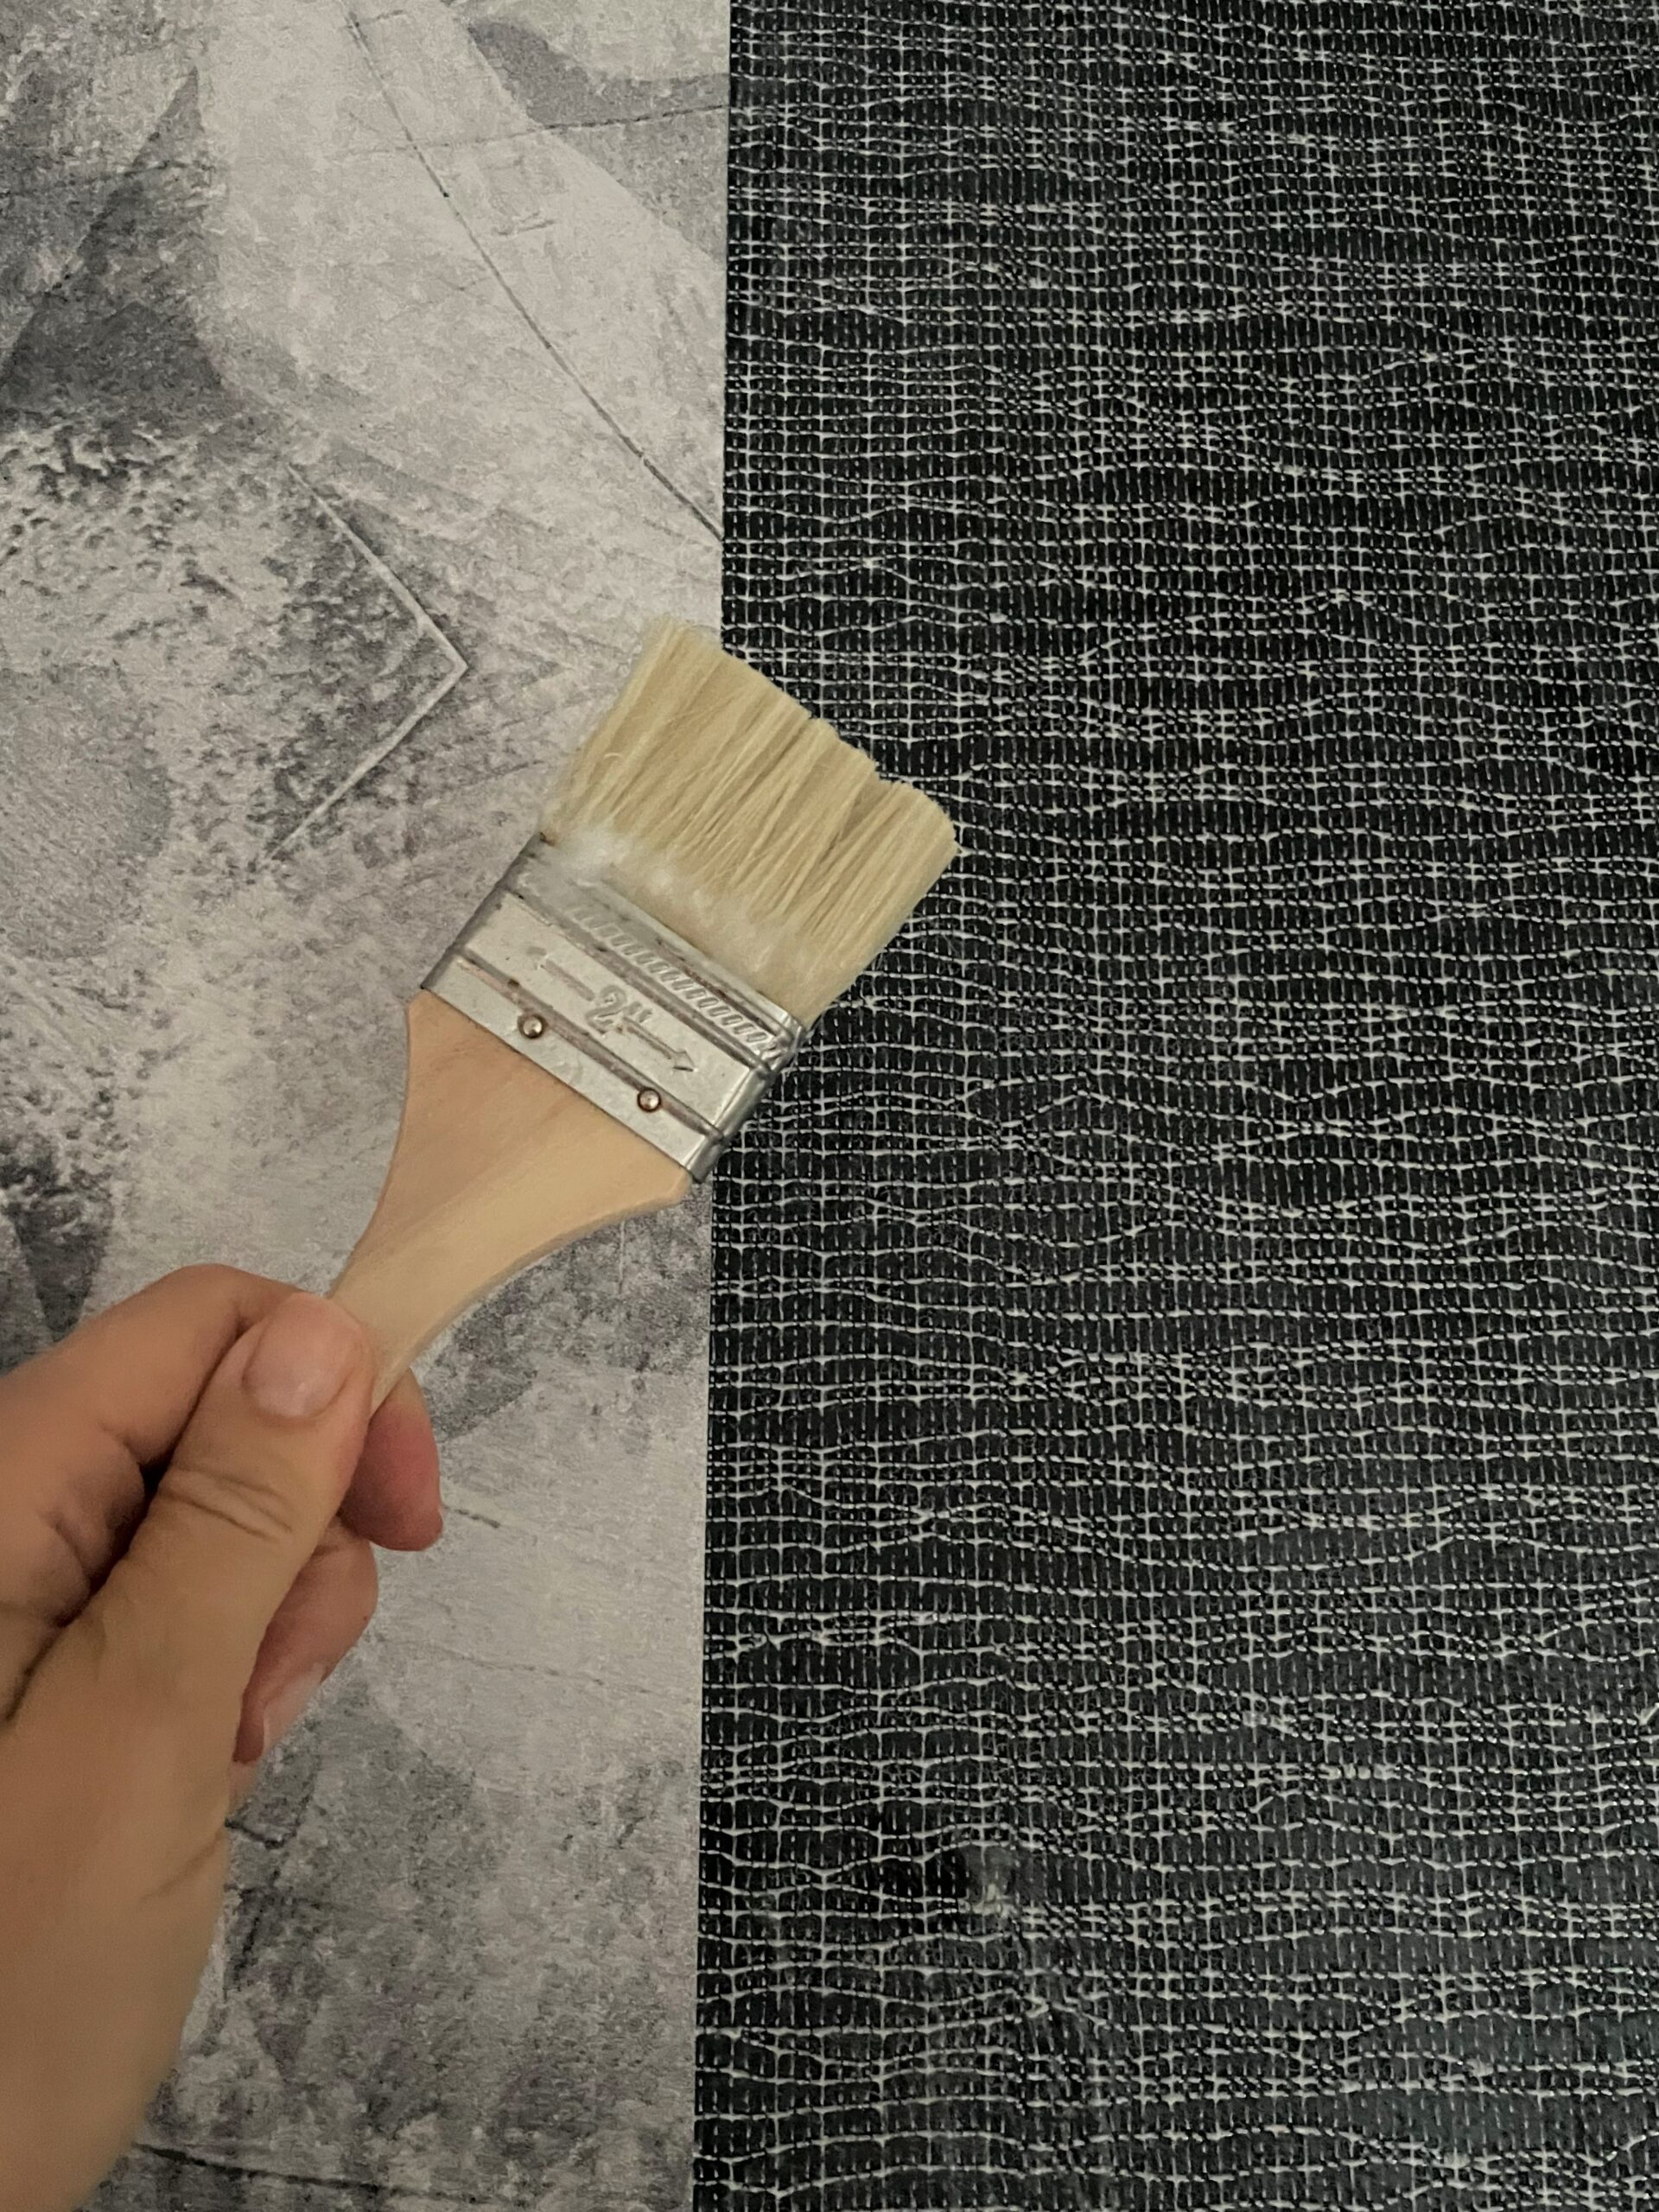
5. Smaller brush
6. Cloths for cleaning, wiping
7. Ruler
Lets start wallpapering!
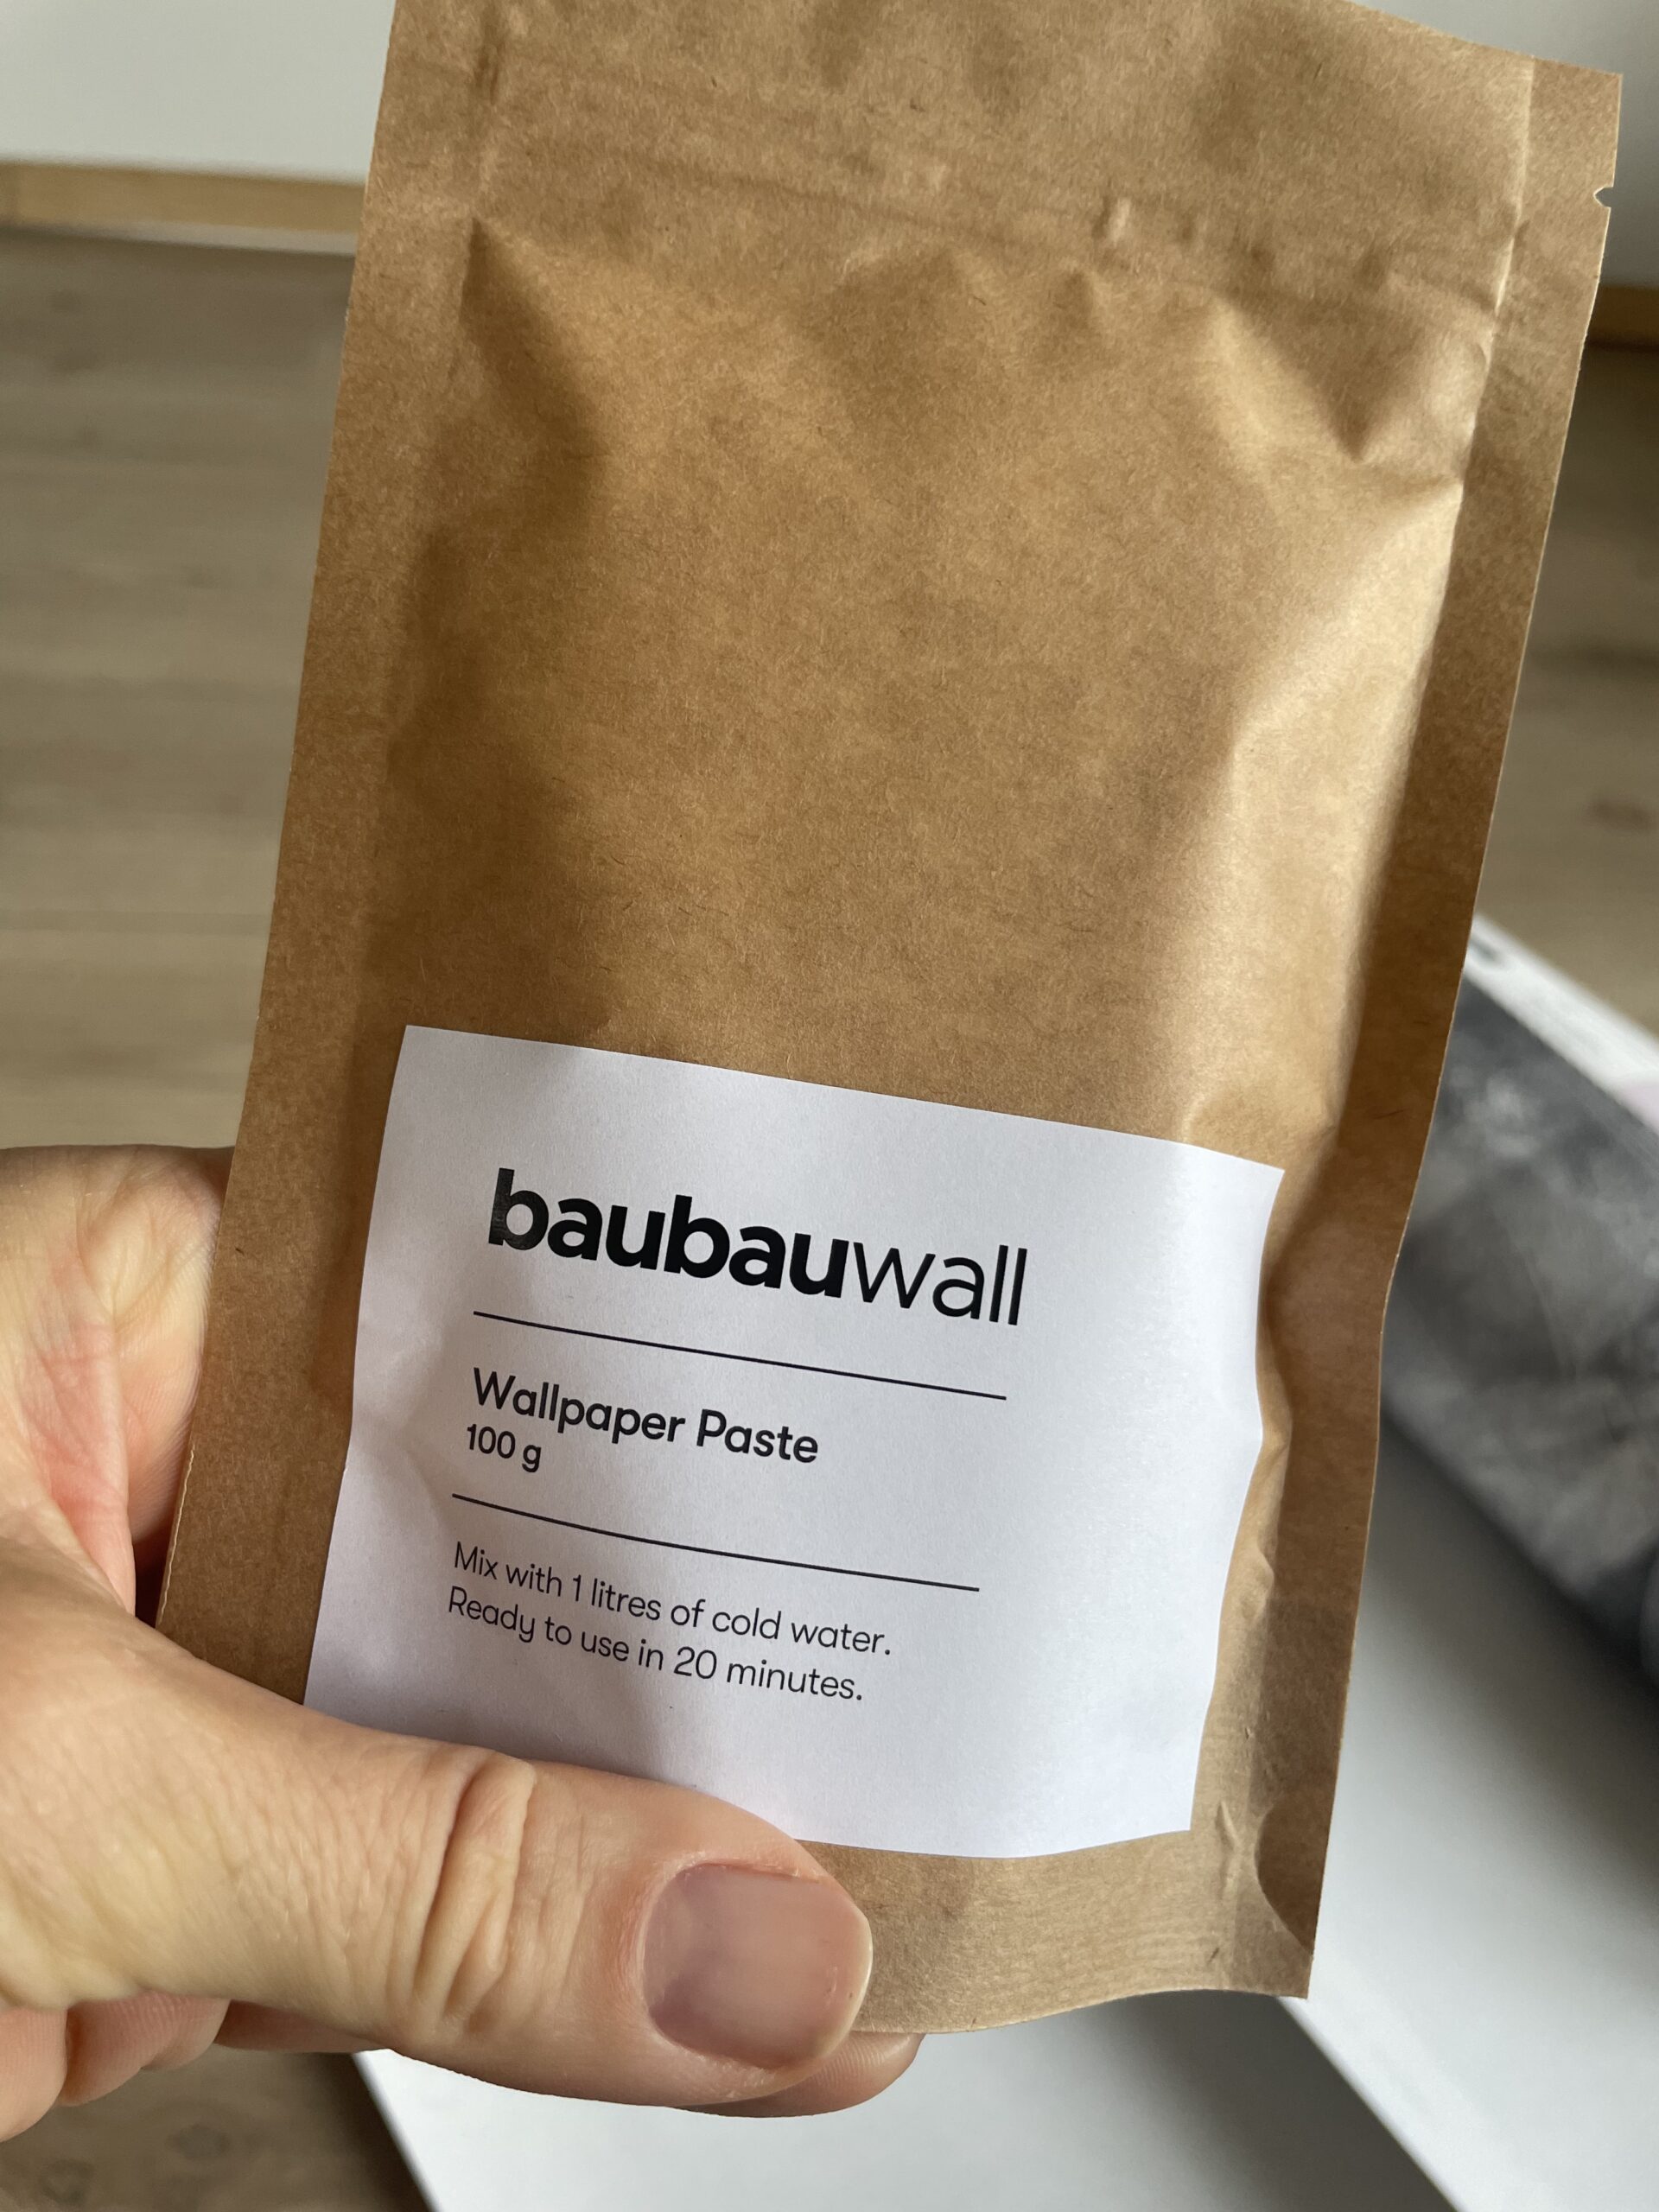
There was wallpaper glue in the wallpaper package. According to the instructions, the package must be mixed with 0.5 L of water. It seemed to me that it was somehow too thick with this amount, and I added water to get a good cream-like glue. By the way – I used a square bucket to mix the glue. Now, I can confirm – please don’t do that! Square and mixing just don’t go together! It is much easier to take a large bowl and mix in it. The A and O of wallpaper glue are that there must be no lumps in it. So – just mix and whip as there’s no tomorrow! Let the glue settle for 20 minutes and start wallpapering!

Let’s put the wallpaper tiles up on the wall!
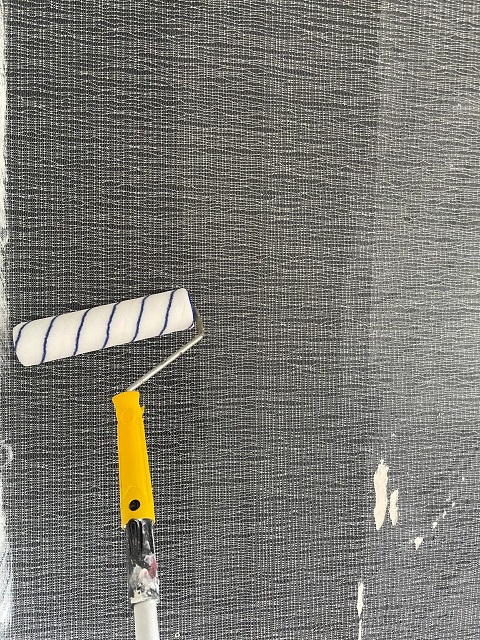
1. Dip a wallpaper roll in glue and roll it to the width and height of the first tile on the wall. Going wider – nothing happens. In my opinion, it is more convenient to use a brush for glue, than a paint roller. Somehow, too much of this glue flew around with the roller. A small brush is a must have item for brushing the bottom and corners.
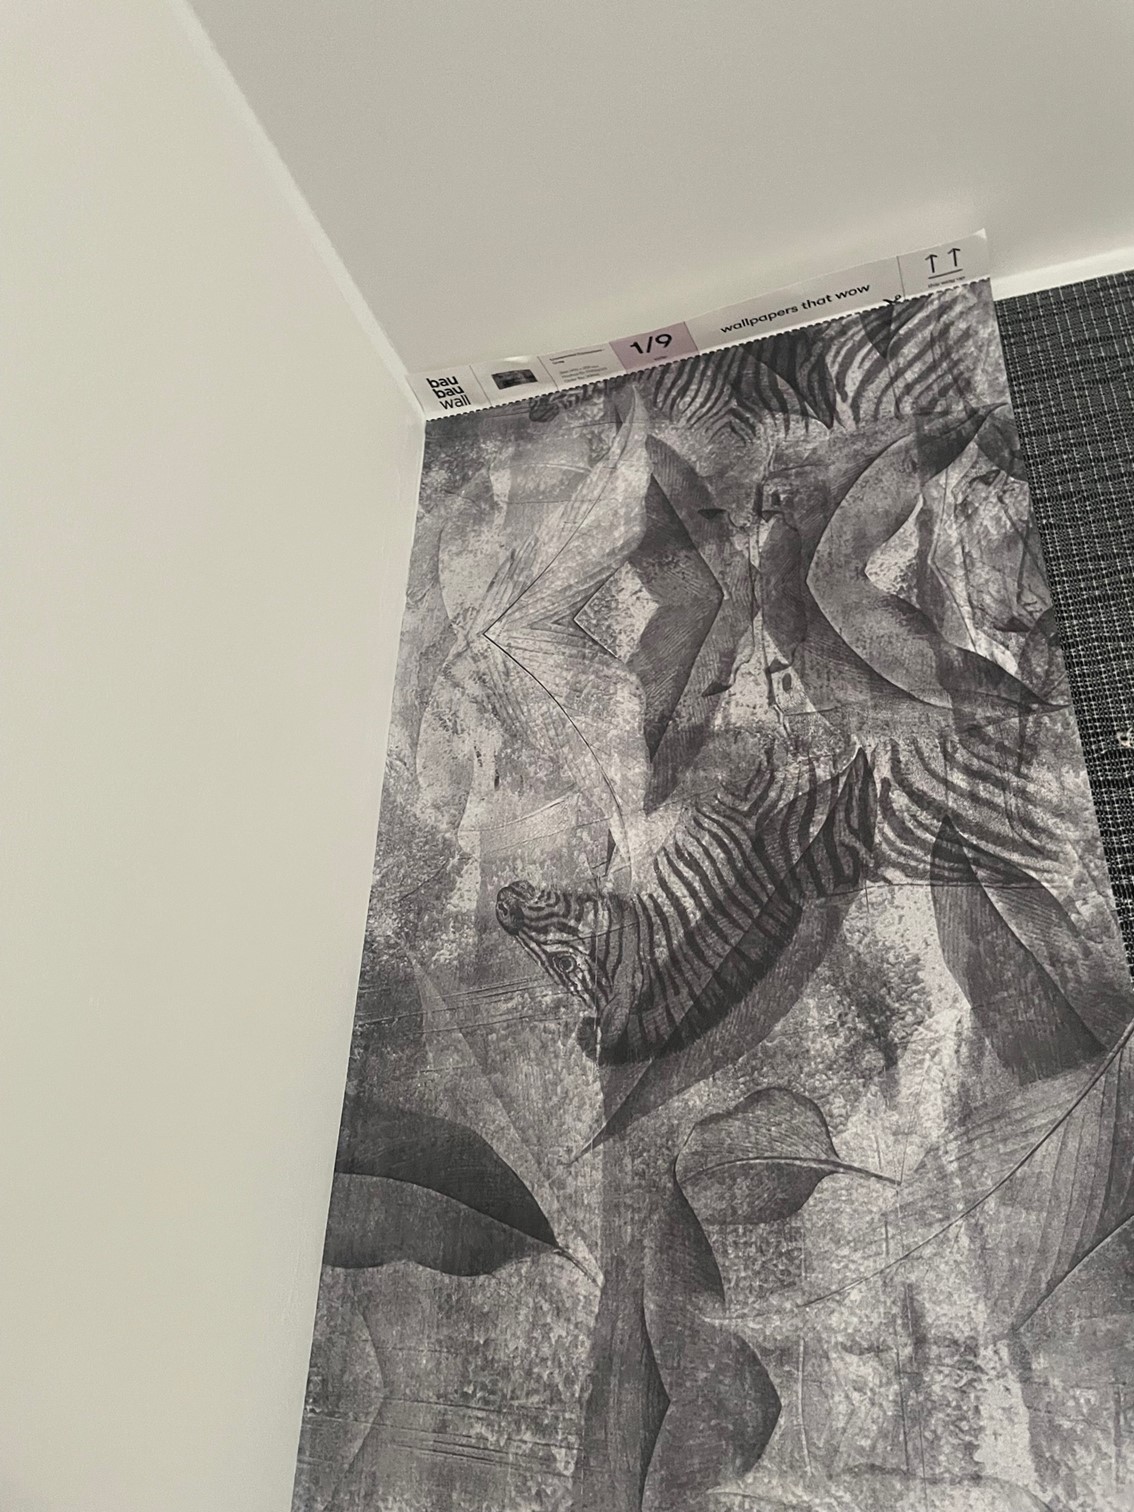
2. As the wallpaper tiles are numbered and ready cut, take tile no. 1 and place it on glue pasted wall. Fortunately, my wall is “simple” – tested and tried – straight. The glue sticks well – you place the first tile in the upper corner of the wall, and then start coming down. No worries – nothing falls down in the meantime. Now, your No One Little Helper becomes involved – the wallpaper smoother! This miracle tool will save the day. Boldly wipe on the wallpaper toward outwards and downwards. No air bubbles should remain. Glue splashes – wipe off with a damp cloth.
3. Tile no. 2. The same process: the glue on the wall, the tile on top. The wallpaper tile must be placed exactly next to the first one. Watch the pattern come together! And it goes! Again – smooth and sweep all the time! By the way, during the wallpapering, I discovered how much easier it is to install wallpaper with a dark and more abstract design! If somewhere the pattern doesn’t match tiny bit, it’s nothing, it is never visible!
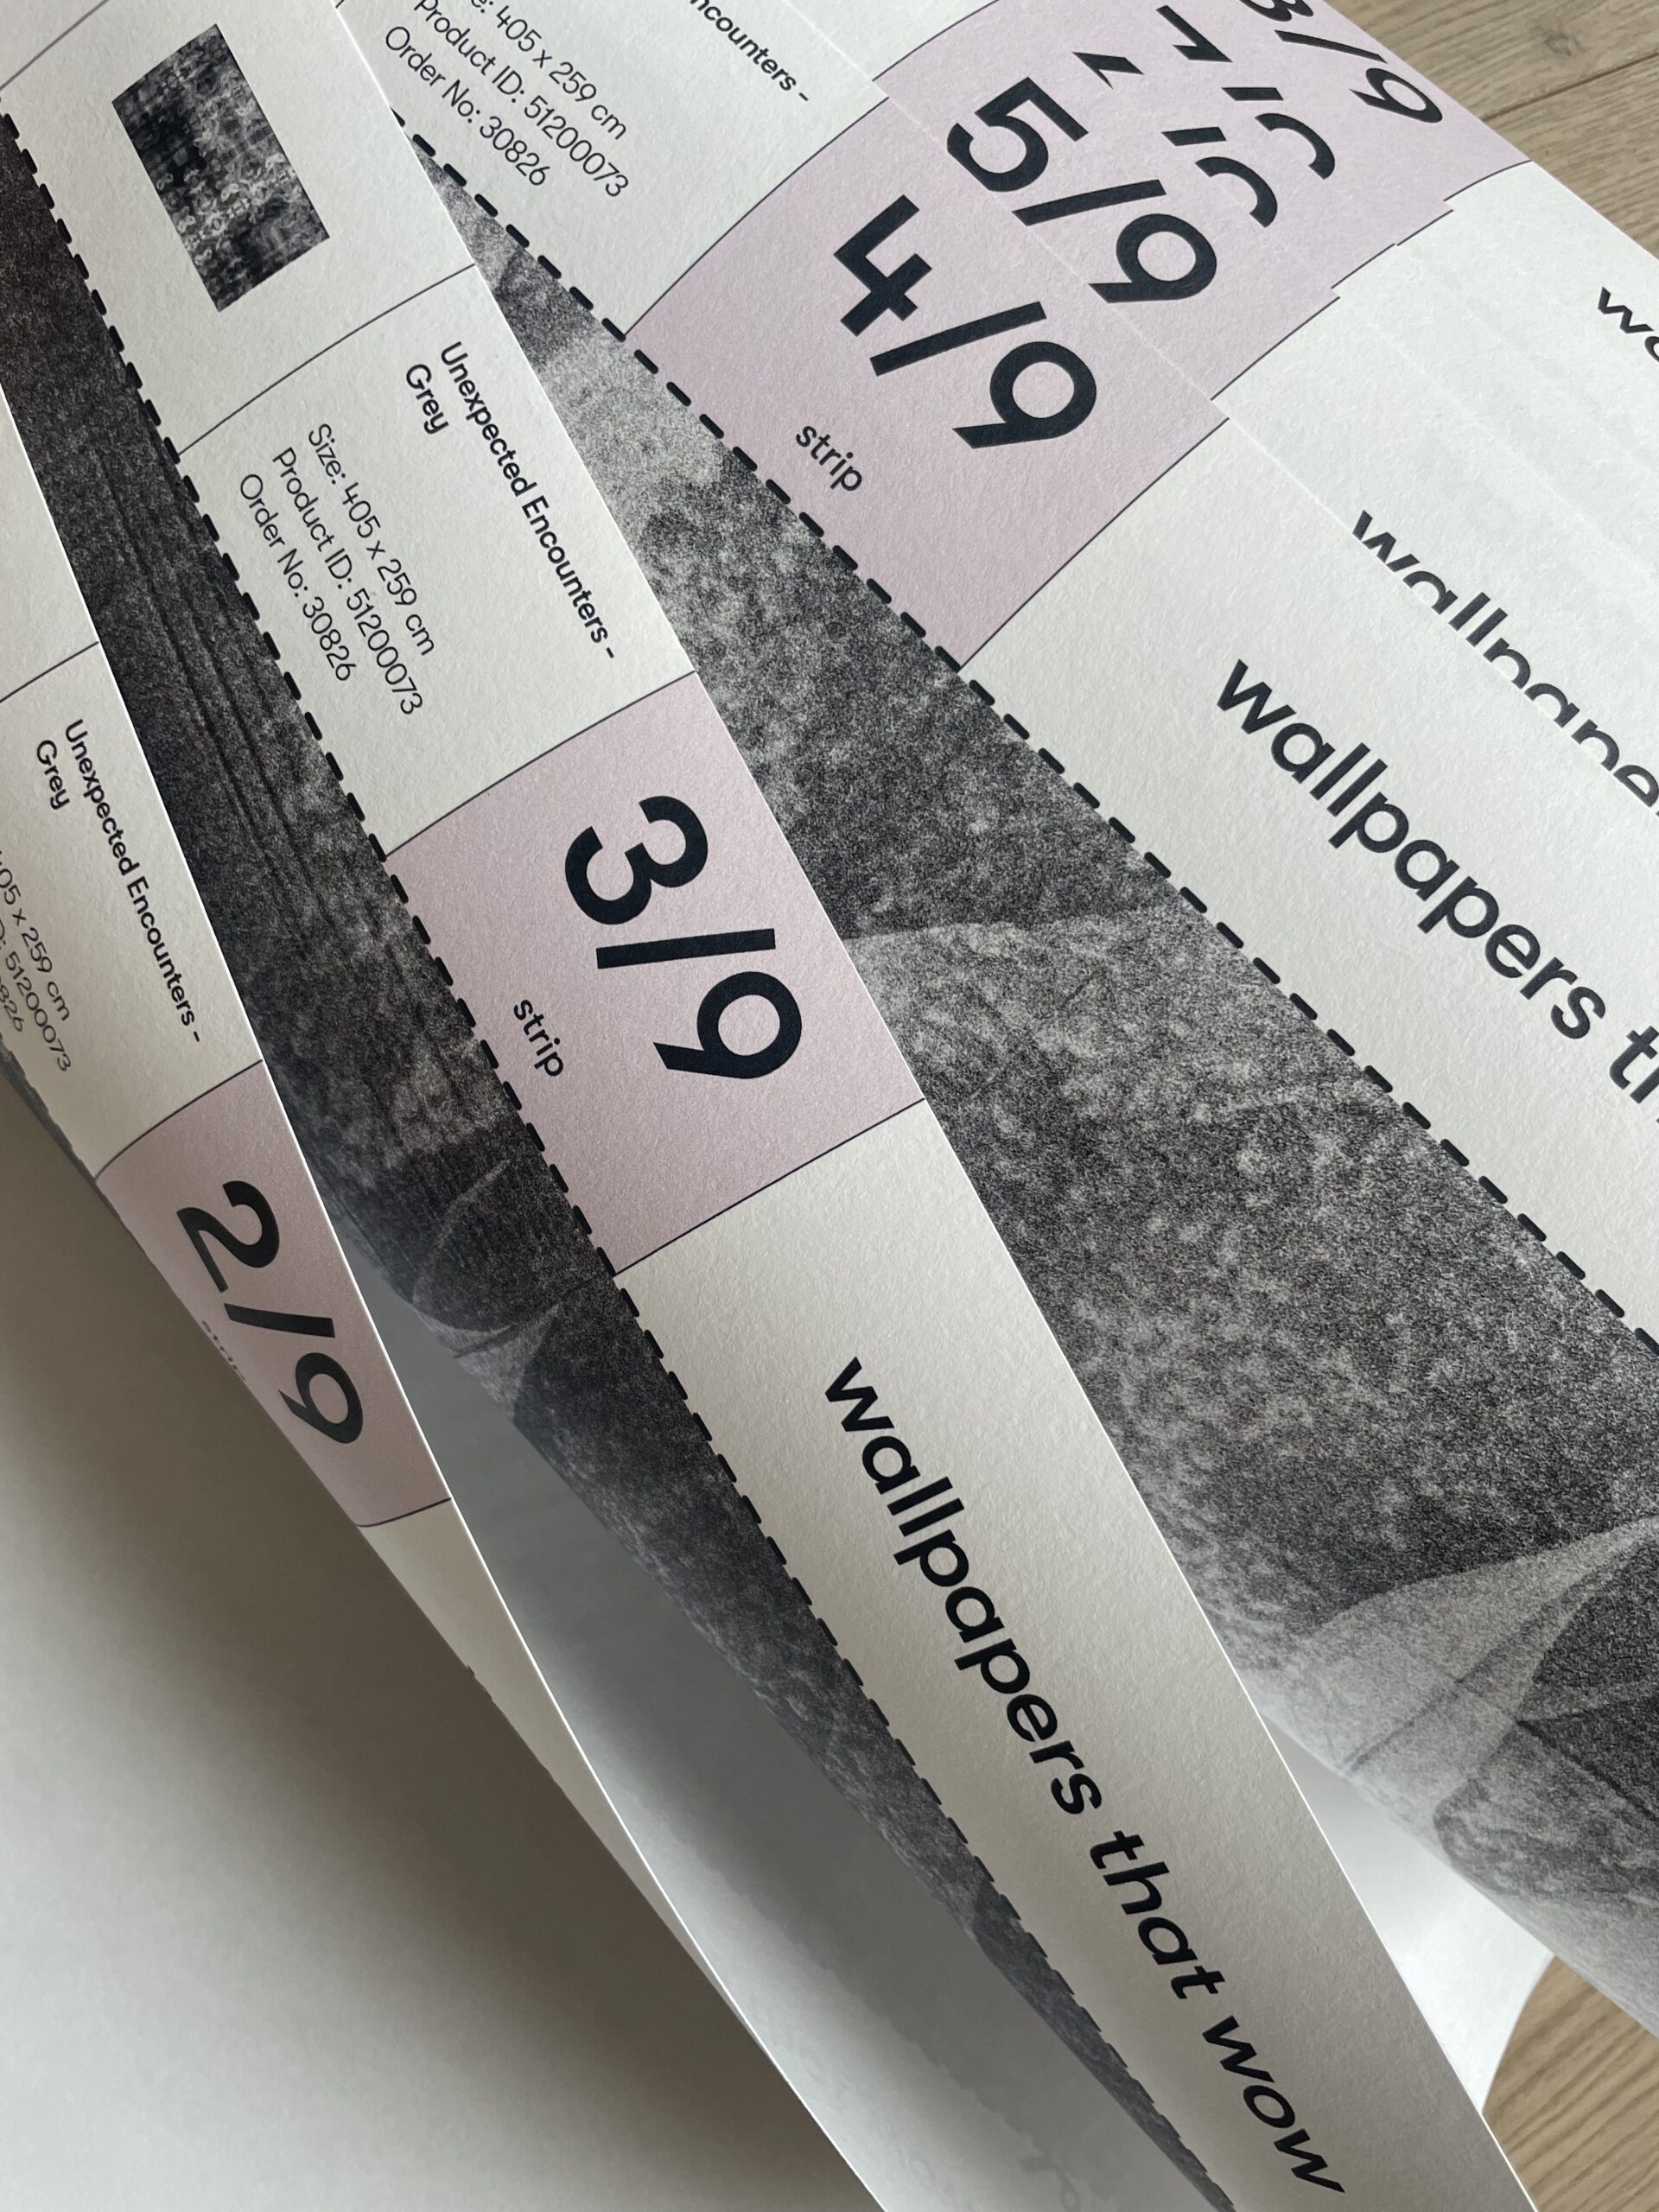
4. I put all the wallpaper tiles on the wall one after the other like this. A total of 8 tiles, plus the last 20 cm little strip. It seemed like a miracle, how every tile matched beautifully with the previous one!
5. Now, take out a sharp knife and, leaning on a ruler, cut off the upper strips of the numbered wallpaper header. If necessary, use a construction knife to cut a new blade after every 2 tiles – a sharp knife is the basis of beauty here! If it seems that the glue under the wallpaper tiles is still wet, wait before cutting.
6. I put the electricity sockets and slats back, cleaned the floor. Total wallpapering time: 4 hours
I want to give a shoutout to my trusty wallpaper installation squad (aka me, myself, and I) for not giving up, even when things got a little sticky – literally! The feeling of accomplishment: I’ d give it 10 points out of 10! It’s amazing how a simple change like a new wallpaper can breathe life into a room!